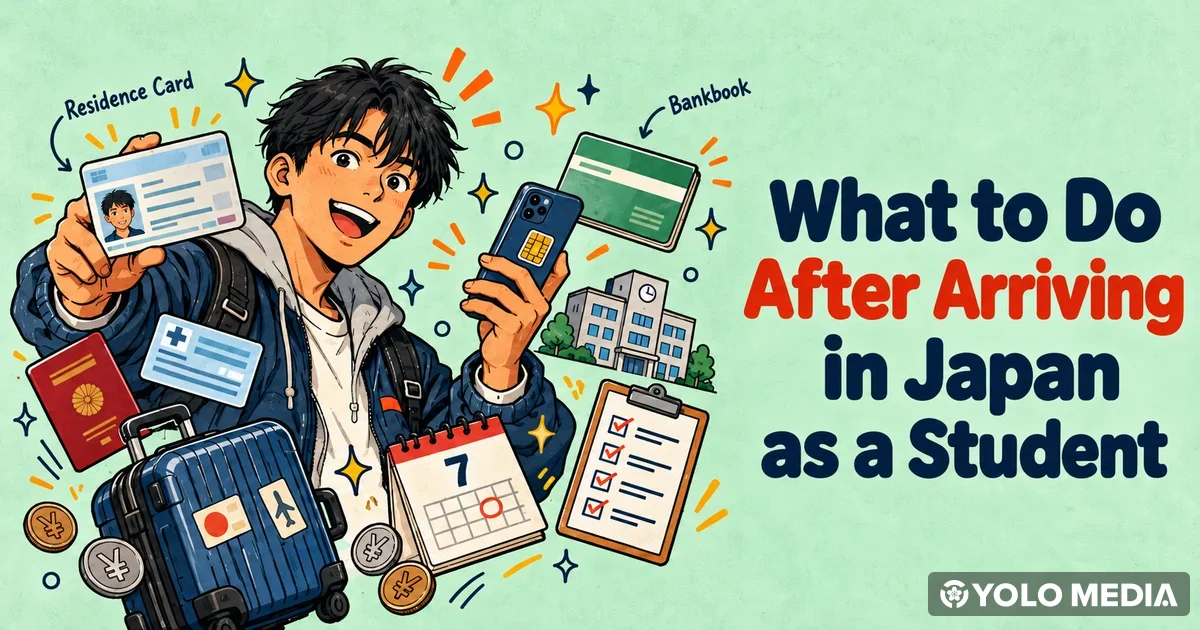
There’s a lot to take care of after arriving in Japan as a student, and it’s not always obvious where to start. This guide isn’t about what to pack before you leave home: it’s about what to do after you land. From the moment you pick up your Residence Card (Zairyu Card) at the airport, you’re suddenly dealing with phone service, address registration, health insurance, and opening a bank account, all in quick succession.
This guide lays out exactly what to do after arriving in Japan as an international student, in an order that keeps you from feeling lost. Rather than going deep on any single procedure, we’ll focus on “what” to do and “in what order.” Each section links to a more detailed guide if you want to dig further into a specific topic. This information is current as of October 2026.
Everything here is something you can act on today, so feel free to treat this as a checklist on your phone.
What to Check the Moment You Get Your Residence Card
The sheer number of things to check might surprise you, but getting this right makes everything that follows, from resident registration to job hunting, much smoother.
As soon as you land, take a close look at your Residence Card. If you’re a new entrant becoming a mid-to-long-term resident, you’ll receive it on the spot during landing examination at one of Japan’s ten designated airports: New Chitose, Sendai, Narita, Haneda, Chubu, Kansai, Kobe, Hiroshima, Fukuoka, or Naha.
(Source: Immigration Services Agency of Japan)
If you arrive through any other airport or port, your passport will instead get a stamp noting that your Residence Card will be issued later. In that case, it’s mailed to you after you complete your address notification at your local municipal office. Don’t worry if you don’t have the physical card yet: just go ahead and take care of your address registration.
It’s worth double-checking the details on your card the moment you receive it. Catching a misspelled name or an incorrect status of residence later means dealing with a correction process you’d rather avoid.
- Does your name match the spelling on your passport?
- Is your status of residence listed as “Student”?
- Does your period of stay match what you expected?
Planning to Work Part-Time? Check Your Work Permit Early Too
If you’re an international student planning to take on paid work, you’ll generally need a “Permission to Engage in Activity Other Than Authorized Status” (commonly called a part-time work permit) before you start. Engaging in paid work without this permission is not allowed, and can result in punishment or deportation.
(Source: JASSO, Study in Japan: Residing in Japan)
It’s worth understanding the application process before you even start browsing job listings.
You apply at the regional immigration office that covers your address, and there’s no fee. The standard processing time runs anywhere from two weeks to two months, so the goal is to have your application already wrapped up well before you actually want to start working, not to apply the moment you decide you want a job next month.
New entrants whose status of residence is “Student,” and whose period of stay is not “3 months,” can apply on the spot at the airport where they receive their Residence Card (this doesn’t apply to re-entry). If you don’t apply at the airport, you’ll need to visit a regional immigration office afterward instead.
(Source: Immigration Services Agency of Japan, Immigration Services Agency of Japan, Application Procedures)
The rules around part-time work (the 28-hour-per-week cap, jobs that are off-limits, and how overworking can affect your visa renewal) are fairly detailed. Before you start working in earnest, it’s worth getting the full picture from the article below.
What to Do After Arriving in Japan, in Order
If you’re not sure where to even start, you’re not alone: most people feel that way. The first few days after arrival can feel like everything is hitting you at once, but it’s not actually that complicated once you settle on an order to work through it.
The recommended flow is three steps: get your SIM or Wi-Fi sorted, handle the bundle of procedures at your municipal office, and then open a bank account.
| Order | What to do | Where |
|---|---|---|
| 1 | Get a SIM or Wi-Fi | Airport, electronics store, or online |
| 2 | Resident registration and related procedures | Municipal office |
| 3 | Open a bank account | Bank branch or app |
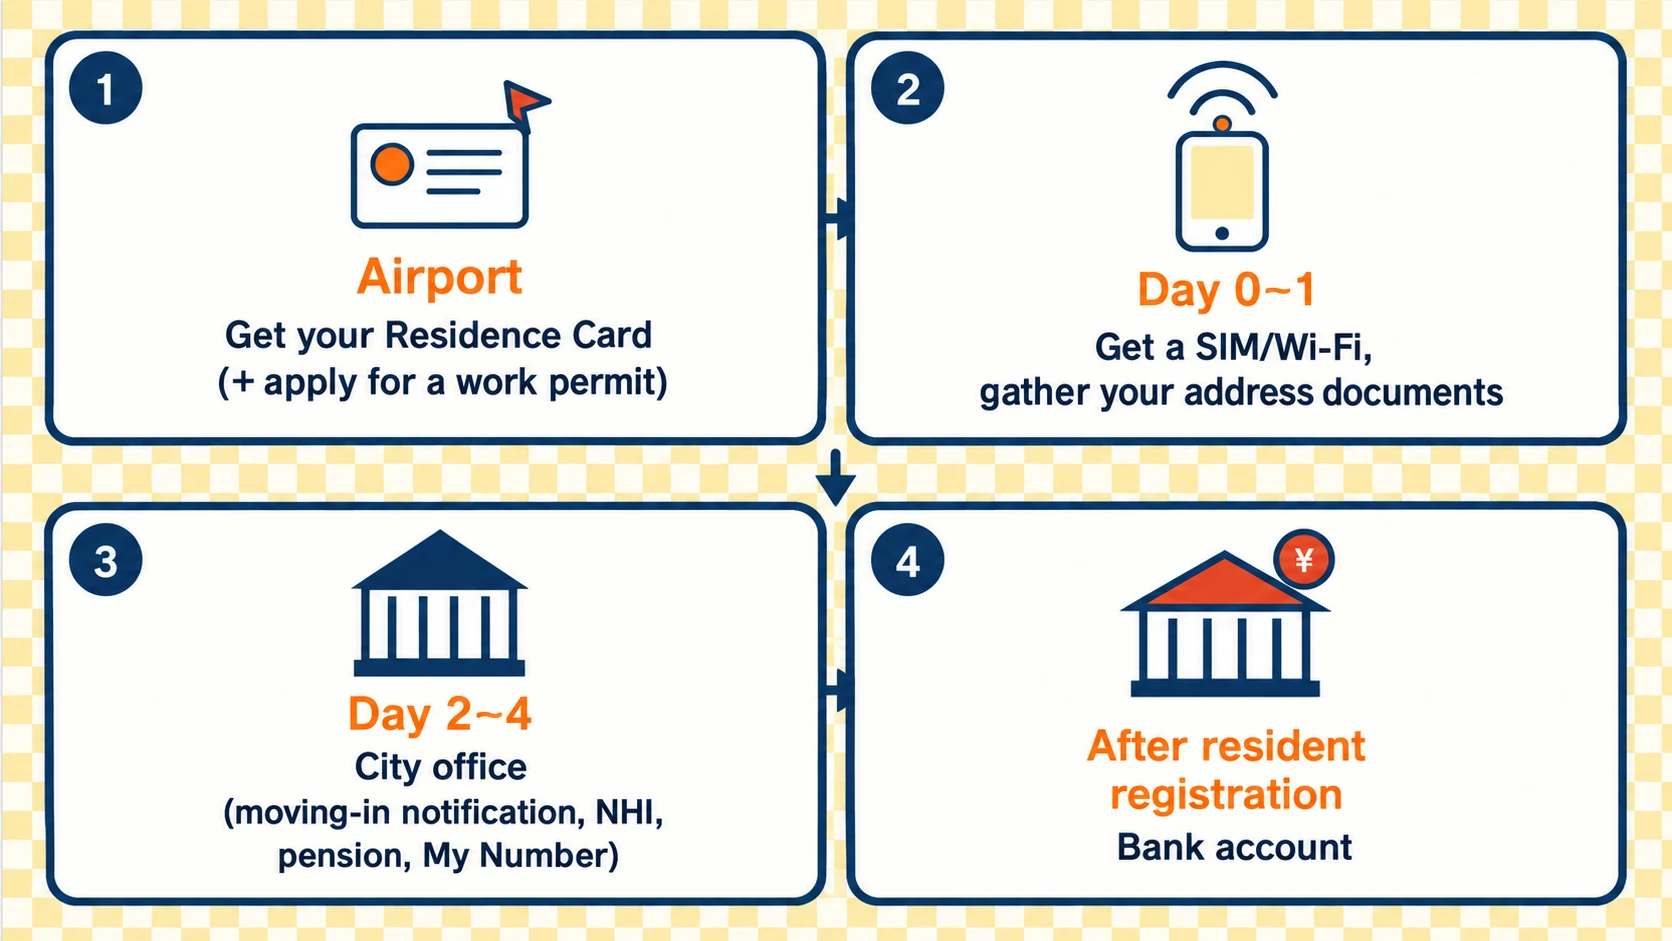
Day 0–1: Get Connected and Gather Your Documents
From the day you arrive through the next day, your top priority is getting a way to communicate. Once maps, translation apps, and online bookings are all working on your phone, everything after this gets a lot easier.
- Get a SIM or Wi-Fi set up
- Confirm how your address is written (check your lease or move-in guide for the correct reading/notation)
- Keep your Residence Card, passport, and any document showing your address together in one place
This is the stage where people most often get stuck on “I don’t know how to write my address” or “I’m missing a document I need.” Gathering your address-related paperwork early is the easiest way to avoid that.
Day 2–4: Take Care of City Office Procedures
Once your address is settled, head to your municipal office and take care of everything in one visit. Getting this done makes health insurance, pension, and opening a bank account all much easier afterward.
- Resident registration, the Moving-in Notification (Tennyu Todoke), which also covers the address notification on your Residence Card
- Enrolling in National Health Insurance (NHI)
- Checking pension: the Special Payment System for Students (Gakusei Nofu Tokurei)
- Confirming how you’ll receive your My Number (Individual Number)
When in doubt, the fastest path is to finish everything you can at the municipal office first. Once resident registration is done, you’ll already have the information you need for insurance and your bank account, which speeds up everything else.
Day 5–7: Open Your Bank Account
With your city office procedures done and your address recorded on your Residence Card, you’re ready to move on to your bank account.
- Opening a bank account
Once things settle down, you can move on to the “next steps”: organizing how you pay for things, reviewing your monthly budget, and starting your job search. We cover these later in this article too, so keep reading.
Get a SIM or Wi-Fi Sorted
Turning on your phone the moment you land, only to find there’s no signal: plenty of people have been there. Getting connected is the first thing you’ll want to sort out after arriving in Japan. Once you have a SIM or Wi-Fi, maps, translation, messaging, and bookings all become possible from your phone, which makes everything that follows at the city office much easier too.
Here’s a quick comparison of the three options people usually weigh against each other:
| Option | Best for | Things to watch for |
|---|---|---|
| Physical SIM | Long-term, stable use; phones that don’t support eSIM | Requires pickup and ID verification; may not activate same-day |
| eSIM | Getting online as fast as possible; phones that support eSIM | Requires setup via QR code scan |
| Pocket Wi-Fi | Multiple people or devices; deciding on a phone plan later | Needs to be carried and charged; check the terms if you lose it |
When you sign up, providers typically ask for ID verification (Residence Card or passport), a Japanese address (requirements may differ before you’ve completed resident registration), a payment method (credit card or direct debit), and whether your device is SIM-free/unlocked. Right after arrival, your payment options may be more limited, so it’s worth checking the requirements before you commit to a plan.
If you’re not confident communicating in Japanese, choosing a provider with multilingual support can take a lot of the stress out of this. A good way to narrow things down is to ask yourself whether you can set it up on your own, and whether help is available in a language other than Japanese if something goes wrong. YOLO JAPAN’s SIM card for international residents, YOLO MOBILE, is one option worth checking out.
If you want a deeper look at choosing a SIM and a plan, we cover that in detail here.
Handling Everything at the Municipal Office in One Visit
Getting bounced between different lines at the counter, only to realize you’ve been there over an hour: this is a story a lot of people have. Multiple trips to the city office are best avoided if you can help it, especially during your first few days after arriving in Japan. Resident registration, health insurance, pension, and My Number can all be handled at the same municipal office window, so it’s worth bundling everything you can into a single visit.
Resident Registration (Moving-in Notification)
The first thing to take care of is resident registration. By law, you must file your address notification, with your Residence Card in hand, within 14 days of settling on where you’ll live. Bringing your Residence Card lets you take care of the moving-in notification and the address notification on your Residence Card in the same visit.
(Source: Immigration Services Agency of Japan)
Once this is done, you’ll have the information you need for health insurance, pension, and opening a bank account, which speeds up everything that follows.
The one document you definitely need is your Residence Card (plus your passport, if you’re still waiting on a card to be mailed to you). You may also be asked for something showing your address or proof of enrollment from your school, but this depends on the municipality, so it’s worth checking your city’s website ahead of time to avoid a second trip. We cover what to do with your resident record (juminhyo) once you have it, and how to choose what to include on it, in a separate article, worth a read once you’ve got yours in hand.
 Living in Japan
How to Get a Juminhyo in Japan: Certificate of Residence
Need a juminhyo in Japan? Compare the four ways to get one, what each costs, whether your residence status appears, and …
Read related article
Living in Japan
How to Get a Juminhyo in Japan: Certificate of Residence
Need a juminhyo in Japan? Compare the four ways to get one, what each costs, whether your residence status appears, and …
Read related article
Enrolling in National Health Insurance
Once resident registration is done, anyone who qualifies enrolls in National Health Insurance. Follow your municipality’s guidance on whether you need to enroll and by when. For the procedure, you’ll typically be asked for your Residence Card, passport, and student ID if you have one. If you want to understand more about how the system works and what share of medical costs you’re responsible for, this article covers it in detail.
Check Pension: The Special Payment System for Students
National Pension (Kokumin Nenkin) covers anyone living in Japan who’s 20 or older. International students can be subject to National Pension contributions depending on their circumstances. However, if you’re a student, there’s a system called the Special Payment System for Students that lets you defer your premium payments, and it’s worth asking about at the counter if you don’t have income.
Depending on your school, you may not qualify for the Special Payment System for Students. Miscellaneous-category schools are only eligible if their course runs at least one year, and if private, only if they have prefectural governor approval. Whether your school is eligible, including Japanese language schools, check the Japan Pension Service’s list of eligible schools.
(Sources: Japan Pension Service, Japan Pension Service, Special Payment System for Students)
Pension is one of those things that gets more annoying to deal with the longer you put it off, with more paperwork going back and forth, so it’s best to check on it the same day as your resident registration. We’ve covered how the pension system works and what you can eventually get back from it here.
Receiving Your My Number and Applying for a My Number Card
Once you complete resident registration, you’re automatically assigned a 12-digit My Number. Getting a My Number Card is optional, but it makes life noticeably easier: you can use it as ID, and it lets you pull certificates like your resident record at a convenience store.
If you want the card, check the “Individual Number Notification” that arrives after your resident registration, and either fill out and mail the enclosed application form, or apply online or at a photo booth. We go into the application process, and how your period of stay relates to your card’s expiration date, in more detail in this article.
 Visa & Legal
How to Get a My Number Card in Japan: Apply, Pick Up, Renew
Applying for a My Number Card in Japan? See the four ways to apply, photo rules, PIN setup, pickup steps, and the expira…
Read related article
Visa & Legal
How to Get a My Number Card in Japan: Apply, Pick Up, Renew
Applying for a My Number Card in Japan? See the four ways to apply, photo rules, PIN setup, pickup steps, and the expira…
Read related article
Open Your Bank Account After Resident Registration
You might think you can get by on cash for a while, but once daily life gets going (rent payments, your phone bill, receiving pay from a part-time job) a bank account becomes close to essential. It tends to come up sooner than people expect, so it’s worth getting the groundwork done in your first week after arriving in Japan, so you’re not scrambling later.
The key point is to handle your bank account after resident registration is complete, not before. If your Residence Card doesn’t yet show your address, the process at the counter often doesn’t go smoothly.
As a general idea, you’ll typically need your Residence Card (with your address on it) and your passport. Beyond that, what’s required depends on the bank.
Some banks won’t open an account for you right after you arrive. Even at Japan Post Bank (Yucho), if you’ve been in Japan less than six months and aren’t employed by an office in Japan, you’re classified as a “non-resident” under Japan’s Foreign Exchange and Foreign Trade Act, which limits how you can use the account: you can’t send money via ATM, and you can’t schedule a transfer for a future date. Once you pass six months and switch your status to resident, those limits go away.
(Source: Japan Post Bank, Foreign Exchange and Foreign Trade Act Guidance)
Check the article below for details on choosing a bank and what you’ll need.
You don’t need to rush out and open a bank account on the day you arrive. Taking care of resident registration and health insurance first, then opening your account once things have settled, works just fine.
Your First Week in Japan Checklist
Here’s everything above condensed into a checklist you can just tick off. Check things off as you finish them.
Day 0–1
- ☐ Received your Residence Card, or confirmed the process for a later mail delivery
- ☐ Checked the details on your Residence Card (name, status of residence, period of stay)
- ☐ If planning to work part-time, confirmed where and how to apply for your work permit
- ☐ Got a SIM or Wi-Fi set up
- ☐ Confirmed how your address is written
- ☐ Gathered the documents you’ll need into one place
Day 2–4
- ☐ Completed resident registration (moving-in notification) at your municipal office, which also records your address on your Residence Card
- ☐ Enrolled in National Health Insurance, or confirmed you don’t need to
- ☐ Checked pension eligibility for the Special Payment System for Students
- ☐ Confirmed how you’ll receive your My Number
- ☐ If getting a My Number Card, confirmed how to apply
Day 5–7
- ☐ Gathered the documents for a bank account, or already applied
What to Think About Once You’re Settled In
Once you’ve worked through everything on this list for your first week after arriving in Japan, the foundation of your life here is largely in place. From here, it’s about fine-tuning things to make daily life more stable.
Once your bank account is open, setting up direct debit or card payments for rent, your phone bill, and utilities helps you avoid missed payments. This is also a good time to sit down and work out your monthly budget, covering your phone bill, rent, and food, so you know exactly what you need each month.
 Living in Japan
International Student Monthly Living Costs in Japan (2026)
How much do international students spend monthly in Japan? JASSO data breaks down rent, food, tuition, regional gaps, an…
Read related article
Living in Japan
International Student Monthly Living Costs in Japan (2026)
How much do international students spend monthly in Japan? JASSO data breaks down rent, food, tuition, regional gaps, an…
Read related article
Once the basics are in place, it’s also a good time to start a part-time job search, as long as you keep it manageable. If you’re not confident with your Japanese yet, starting with a job that doesn’t require much conversation, or one used to hiring international students, can take the pressure off.
Using a job platform that lets you filter by things like “no Japanese required,” “no experience needed,” or “international students welcome” makes it much easier to find something that fits. YOLO JAPAN curates listings that are easy to apply to even for your very first part-time job in Japan, so it’s worth a look when you start searching.
The Bottom Line: What to Do After Arriving in Japan
Your first week in Japan can feel overwhelming just because of how much there is to do. But if you stick to the order (check your Residence Card, get your SIM sorted, handle the city office procedures together, then open a bank account) you can work through it one piece at a time.
- Check your Residence Card and, if relevant, your work permit right at the airport or soon after you arrive
- Getting your SIM or Wi-Fi sorted first makes everything that follows much easier
- Finishing resident registration makes health insurance, pension, and your bank account easier to handle
- There’s no need to rush your bank account: it’s fine to open it calmly after resident registration
We hope this checklist comes in handy as a running list on your phone. Work through it one step at a time, and settling into life in Japan will go more smoothly than you might expect.
Disclaimer: This article is for informational purposes only and does not constitute legal advice. Immigration rules may change. Always verify with official sources or consult a professional.